
-20%

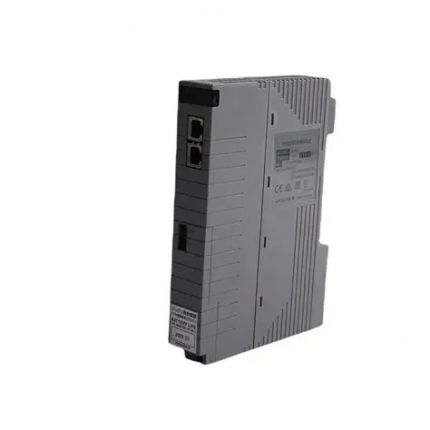
YOKOGAWA AIP121-S00 Control Module
Original price was: $17,346.00.$15,834.00Current price is: $15,834.00.个
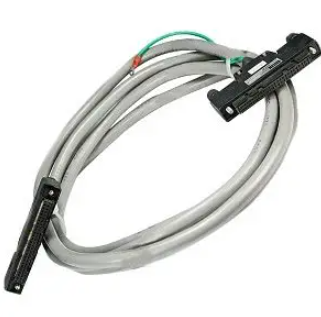
YOKOGAWA LC82 * A Industrial Controller
Original price was: $18,453.00.$17,894.00Current price is: $17,894.00.个

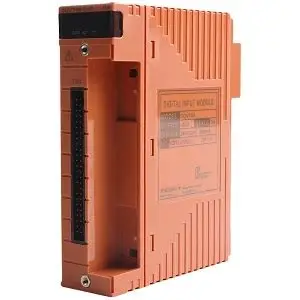
YOKOGAWA UR1800 Recorder
Original price was: $28,547.00.$22,747.00Current price is: $22,747.00.个
The core of the Yokogawa Electric UR1800 industrial recorder (including pen and dot matrix printing) covers safety specifications, installation requirements, operating procedures, parameter settings, maintenance calibration, and troubleshooting. The equipment supports multiple types of inputs (DC voltage, thermocouple, thermistor, etc.) and multi-channel recording (up to 24 channels), with features such as compact design, high reliability, and interactive operation. It must strictly follow safety requirements such as power grounding and installation environment, and achieve recording, printing, alarm and other functions through the operation panel or remote control. Regular maintenance can ensure measurement accuracy and equipment life.
Description
YOKOGAWA UR1800 Recorder
Core features and technical specifications of the product
1. Core functional features
(1) Basic performance
Compact design: Depth of only 220mm, suitable for limited installation space, panel installation method (panel thickness 2-26mm)
High reliability: The pen type uses contactless potentiometers and brushless DC servo motors, while the dot matrix type uses high-voltage solid-state relays; Modular design simplifies maintenance
Universal adaptation: Supports 90-250VAC (except 132-180VAC), 50/60Hz power supply (except/P1 model), without the need for a switch
Display capability: Large VFD display screen, synchronously displaying measurement data (including engineering units), clock, and bar chart (1% resolution), supporting two types of bar charts: left reference (0-100%) and center zero position
(2) Input and Measurement
Input types: compatible with DC voltage (20mV-20V), thermocouple (TC, including 12 types of R, S, B, K, etc.), thermistor (RTD, including PT100, JPT100, etc.), digital input (DI, contact/voltage level)
Measurement ability: pen style up to 4 channels for synchronous recording, dot matrix style up to 24 channels; Pen sampling speed of 125ms, dot matrix recording period of 6 channels/10 seconds to 24 channels/30 seconds
Calculation function: Supports two channel difference calculation (DELT), linear scaling (SCL), square root calculation (SQRT), optional mathematical operations (MATH) and timeline statistics (TLOG) functions
(3) Recording and Printing
Recording modes: Trend recording (no overlap in dot matrix format), Region recording (avoiding overlap in sub-band format), Partial extension recording (enlarging detail range), Pen offset compensation (POC, pen specific)
Printing types: manual printing, list printing (including range, alarm, etc. settings), cycle printing (trigger mode and interval can be set), alarm printing (including occurrence/recovery time), message printing (up to 5, 16 characters each), set list printing, etc
Printing features: Pen style supports 4 colors: red/green/blue/purple, dot matrix style supports 6 color assignments; The chart shows a 20 meter Z-shaped folded paper with an effective recording width of 180mm
(4) Alarm function
Alarm types: high limit (H), low limit (L), difference high limit (h), difference low limit (l), rise rate (R), fall rate (r) 6 types
Alarm configuration: Up to 4 levels of alarms per channel, supporting relay outputs (up to 24), can be set to hold/non hold mode, hysteresis value (0% or approximately 0.5% range), flashing indication, etc
2. Key technical specifications
Measurement accuracy: DC voltage ± (0.1% -0.3% reading+2-3 digits), TC ± (0.15% reading+0.5-1 ℃), RTD ± (0.15% -0.4% reading+0.3-1.0 ℃)
Chart speed: Pen style 5-12000mm/h (82 levels), dot matrix style 1-1500mm/h (1mm step)
Environmental adaptability: Working temperature 0-50 ℃, humidity 20% -80% RH, anti vibration 10-60Hz ≤ 0.02G, protection level IP54 (front door meets DIN 40050)
Physical parameters: Dimensions 288 (W) × 288 (H) × 220 (D) mm, weight 8.9-9.6kg (depending on model), maximum power consumption of 70VA
Installation and safety regulations
1. Installation requirements
(1) Installation environment
Environmental conditions: Good ventilation, avoiding direct sunlight, heat sources, corrosive gases, strong electromagnetic fields, and severe vibrations; Horizontal installation (can tilt backwards ≤ 30 °)
Space restrictions: Avoid installation in civilian environments to prevent interference with other devices; The installation panel needs to meet the thickness requirements and reserve maintenance space
(2) Wiring specifications
Power wiring: Use 600V PVC insulated wire (AWG18) with a grounding resistance of ≤ 100 Ω; Separation of power lines from other lines ≥ 0.1m (recommended 0.5m)
Input wiring: It is recommended to use shielded wires. For TC/RTD wiring, attention should be paid to compensating wires and balancing the three wire resistance; The input terminal should be protected from exposure to airflow, and a transparent cover plate should be placed after wiring
Other wiring: alarm output, fault/paper out output, remote control wiring must follow the corresponding terminal definition, use shielded wire and ground correctly
2. Safety guidelines
Power safety: Confirm that the power supply voltage matches and prohibit the use of 132-180VAC power supply; Replacing the fuse requires using the specified specifications (such as 250V 750mA delay type) and power-off operation
Grounding requirements: Non portable models must be grounded, and it is prohibited to cut off internal or external grounding wires
Operation taboos: Do not operate in flammable liquid/vapor environments; It is prohibited to touch the inside of the device with electricity, and internal maintenance is only allowed to be carried out by professionals
Troubleshooting: In case of abnormal sounds, odors, or smoke, immediately turn off the power and contact the service center
Operation Process Guide
1. Preparation before startup
Open box inspection: Confirm that all accessories are complete (pen, ribbon, fuse, chart paper, power cord, etc.) and that there is no damage to the appearance; Verify that the nameplate model code matches the order
Unpacking operation: Open the front door, lift up the display screen, remove the transport fixing gasket, and close the display screen as required
Preheating requirement: Preheat for 30 minutes after startup, and may take longer for the first use after wiring
2. Daily basic operations
(1) Power and Record Control
Power switch: located below the inner side of the front door, press to switch the switch status; After booting up, the device automatically performs a self check
Record start/stop: Press the RCD key to start/stop recording, this key is disabled in remote control mode
Chart feed: Press and hold the FEED button to manually feed the chart until it is flat (it is recommended to feed 2 pages after turning on)
(2) Consumables installation
Chart paper: Open the lock of the chart box, insert Z-shaped paper, ensure that the sprocket is engaged with the paper hole, close and lock the chart box
Pen/Ribbon: For the pen style, lift up the display screen, remove the old pen cartridge, and replace it with a new pen (note the color correspondence); The dot matrix needs to turn off the power, replace the ribbon cartridge, and adjust the tension
Battery replacement: The backup lithium battery of the device has a lifespan of about 10 years. If the BAT indicator light is constantly on, please contact the service center for replacement; When the IC memory card battery flashes, it needs to be replaced according to the corresponding manual
(3) Printing operation
Manual printing: Press the PRIMT key, select “MANUAL_PIN_START”, press the ENT key to start, and press the PRIMT key halfway to select stop
List printing: Press the PRIMT key and select “LIST-PRINT-START”, which contains information such as date, range, alarm, etc
Message printing: You need to first set the message content, press the MENU key to select “PRINCT-MESSAGE”, specify the message number, and then print
(4) Alarm processing
Alarm response: When an alarm occurs, the ALM indicator light flashes and the output relay is activated; Press the ACK button to confirm the alarm (reset the relay in hold mode)
Buffer clearing: When the alarm or message buffer is full (indicated by an asterisk), press the MENU key to select the clear buffer function
3. Parameter setting operation
(1) Mode switching
Operation mode: default upon startup, used for daily recording, printing, alarm processing, etc
SET mode: Long press the MENU key for 3 seconds to enter, used for inputting basic settings such as range, alarm, unit, etc., and then long press the MENU key to return
SET UP mode: Press and hold the ENT key during startup to enter, used for initial setting modifications (such as alarm relay type, A/D integration time, etc.), which need to be stored or abandoned through “SETUP=END”
(2) Core setting process
Input range setting: Select “SET=RANGE” in SET mode, choose the channel and input type (VOLT/TC/RTD, etc.), set the range and recording span (left/right values)
Alarm settings: Select “SET=ALARM” to set the alarm level, type, threshold, relay activation status, and number
Chart speed: Select “SET=CHART” and choose the corresponding speed value according to the model (direct selection by pen, manual input by dot matrix)
Clock setting: Select “SET=CLOCK”, enter the year, month, day, hour, minute, and second, press the ENT key to confirm the start of the clock
Channel Copy: Select “SET=COPY” and specify the source and destination channels (only copy from low to high numbering)
(3) Auxiliary settings
Regional record: Select “MODE=ZONE” in AUX settings and set the left/right boundaries of each channel (minimum width 5mm)
Partial extension: Select “MODE=PART” to set the channel, enable status, compression ratio, and boundary values
Tags and Messages: Set channel tags (up to 7 characters) and message content (up to 5, each with 16 characters)
Remote control: configure the second chart speed (enabled when alarm/remote trigger), assign remote terminal function
Maintenance and troubleshooting
1. Regular maintenance
Periodic inspection: At least once a year, check the display/recording function, remaining consumables, and BAT indicator status
Consumables replacement: The remaining length of chart paper can be viewed through the paper edge markings; Replace the fuse every 2 years
Calibration requirements: Calibrate once a year using a standard voltage source (such as Yokogawa 2552) and a decimal resistor box (such as Yokogawa 2793-01)
Cleaning and lubrication: The pen holder shaft needs to be cleaned (once a year, ethanol can be used); The dot matrix style requires annual lubrication of the pen holder shaft (using designated lubricant B9901AZ)
2. Fault handling
(1) Common error codes
ERROR 011: The chart is exhausted and the chart paper needs to be replaced
ERROR 040: The reference channel number for the difference channel is incorrect and needs to be reset
ERROR 045: The left/right values of the recorded span are equal, and the span needs to be adjusted
ERROR 060: Attempting to set an alarm while skipping a channel, requires modifying the channel type
ROM/RAM/NV ERROR: System storage failure, please contact the service center
(2) Typical troubleshooting
Record no response: Check the power wiring, fuse status, and whether the record has been started; Still no response. Contact the service center
Large measurement deviation: Check the input range and span settings, wiring correctness, and grounding status; Check the ambient temperature and interference sources
Unclear printing: Replace the pen with a new one and check the tension of the ribbon in a dot matrix manner; Confirm that the chart speed is within the allowed printing range
No response to keys: Check the keyboard lock status, insert the key or disable the lock function in SET UP mode
Advanced configuration and optional features
1. Initial setting modification (SET UP mode)
Alarm function: Set relay type (AND/OR), activation mode (power on/off), hold mode, hysteresis value, sampling interval
Input settings: adjust A/D integration time, TC burning direction, RJC (reference compensation) type, input filter (pen style), moving average (dot matrix style)
Display settings: Select bar chart type (left reference/center zero position), temperature unit (℃/℉)
Lock settings: Configure keyboard lock function, select the allowed keys for operation
2. Optional features
Communication interface: RS-422-A interface, supports data transfer with PC or IC memory card
Remote control: achieve functions such as recording start stop, switching chart speed, and triggering printing through terminals
Mathematical operations: supports basic arithmetic, square root, absolute value, logarithmic and other operations
Timeline statistics: statistical analysis of timeline data
Possible Models Needed
AIP121-S00
CP461-50
ALR121-S00
ATK4A-00
2302-32-VLE-2
VI702
AIP171
YNT511D
PW501
AIP578
AIP591
ALP121
VC401-10
VI451-10
PW441-10
AVR10D-A22010
PW701
ATK4A-00 S1
S9361DH-00
AIP830-111
SDV144-S63
AMM42
DR1030B60
PSCAMAAN
eight billion six hundred and sixty-two million five hundred and sixty thousand
eight billion five hundred and ninety-six million and twenty thousand
eight billion six hundred and sixty-two million five hundred and seventy thousand
16137-153
16137-223
16137-222
16137-188
16137-151
PSCDM024DCBAN
16114-500
16137-119
VO/E2/TCDM24/L8
V0/E1/TCAM/L08
CP451-10
EB501
NFAI143-H00
SDV144-S13
ANR10D
ST6
LC82*A
Additional information
| Weight | 0.28 lbs |
|---|---|
| Dimensions | 457 × 457 × 236 in |
Reviews (0)
Shipping and Delivery


Reviews
There are no reviews yet.